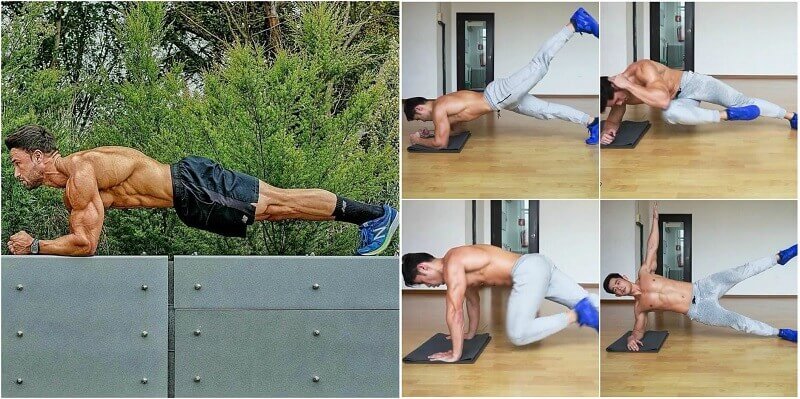
Eight hours and one minute: That’s the world record for longest-held plank! But you don’t have to be a planking superstar (thank goodness!) to get the full-body strengthening benefits that planks provide. And more than just chiselled abs, strengthening your core with planks will help prevent back injuries and help maintain a healthy posture.
Planks are also easy to learn, and you can do them at home, in your office or whilst travelling, so there’s no excuse to avoid them! If you’re getting bored with the standard plank, however, here are nine other variations to help break up the monotony.
STANDARD PLANK
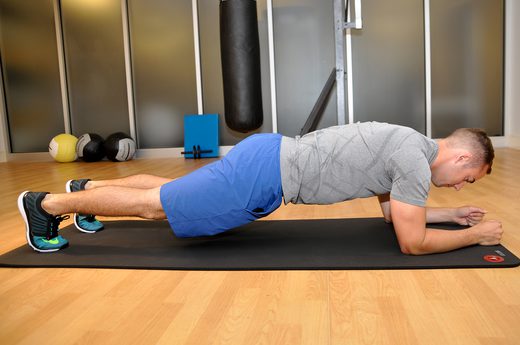
If you’re new to planks (or just haven’t done them in a while), chances are you’ll start to shake when you get tired. But don’t let that intimidate you! Keep holding until you can’t hold your hips up anymore. When they start to drop, stop. Do three sets, holding as long as you can each time. When you can hold it for more than one minute, it’s time to move on to something more difficult.
HOW TO DO IT:
- Get down on the floor and put your elbows and forearms on a comfortable surface.
- Create a straight line from your shoulders to your ankles.
- Hold this position without moving.
REACHING PLANK
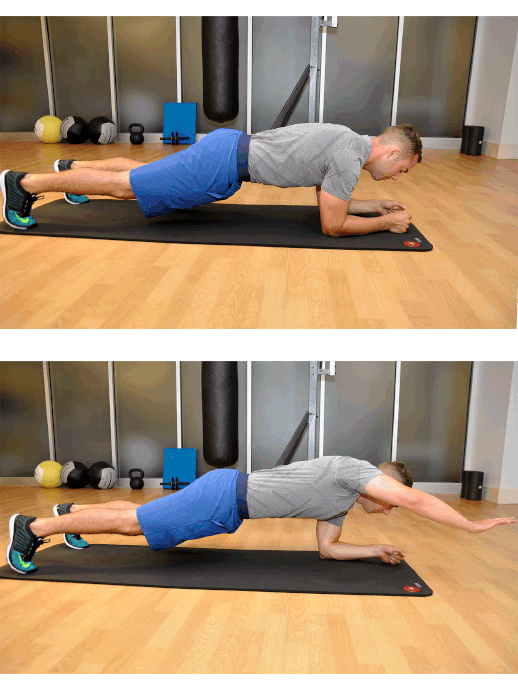
Mix up the standard plank to make things more difficult. This version requires more core stabilisation because you’ll be moving your arms. Once you can do at least 10 reps with each arm, move on to a more advanced variation.
HOW TO DO IT:
- Start in a plank, then slowly reach one arm forward until your elbow is straight.
- Pause for one second, and then pull that arm back and plant your elbow so that you’re in the basic plank again.
- Alternate arms with each rep, and do as many reps as possible on each side.
BIRD-DOG PLANK
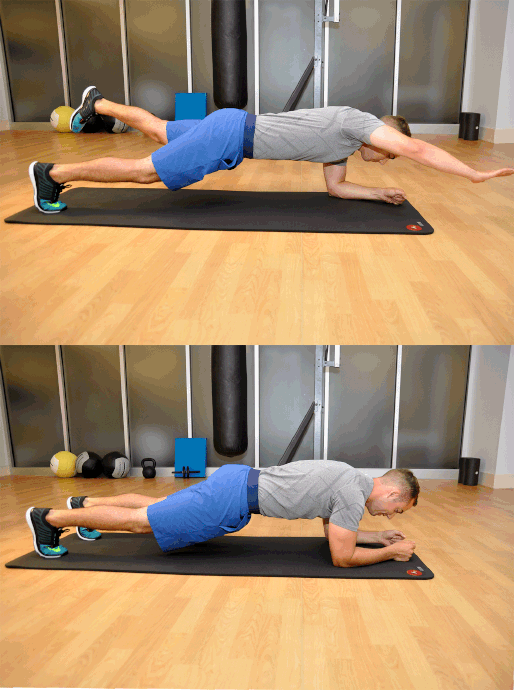
Unlike the reaching plank, with this variation you’re trying to balance on one arm and one leg for as long as possible. This is a very challenging exercise, because you’ll need lots of balance and strong arms and legs to hold yourself up.
HOW TO DO IT:
- Start in a standard plank.
- Reach your right arm forward until your elbow is straight.
- Now lift your left leg off the ground, keeping your knee straight.
- Hold this position as long as you can, and then switch sides (left arm reaches forward and right leg goes up).
PLANK WALK-DOWN
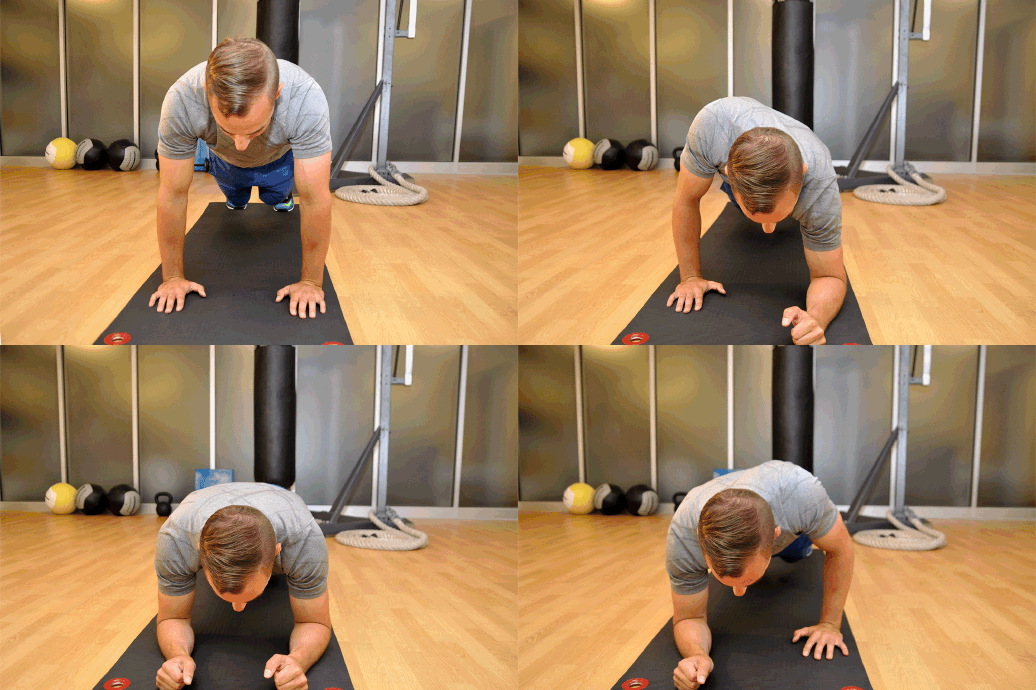
Incorporate your upper body with this variation. Bonus: This version can help you learn how to do a proper push-up.
HOW TO DO IT:
- Start in push-up position and lower one elbow/forearm to the ground.
- Then move the other hand down so that both forearms are flat on the ground.
- Pause, and then take the arm that went down first and plant that hand on the mat.
- Push yourself up on that side.
- Take the other arm, plant your hand and push yourself back up to the top position of a push-up.
- On the next rep, switch the arm that goes down first.
- Do five reps going down with the right arm first and five reps going down with the left arm first.
PLANK KETTLEBELL SLIDE
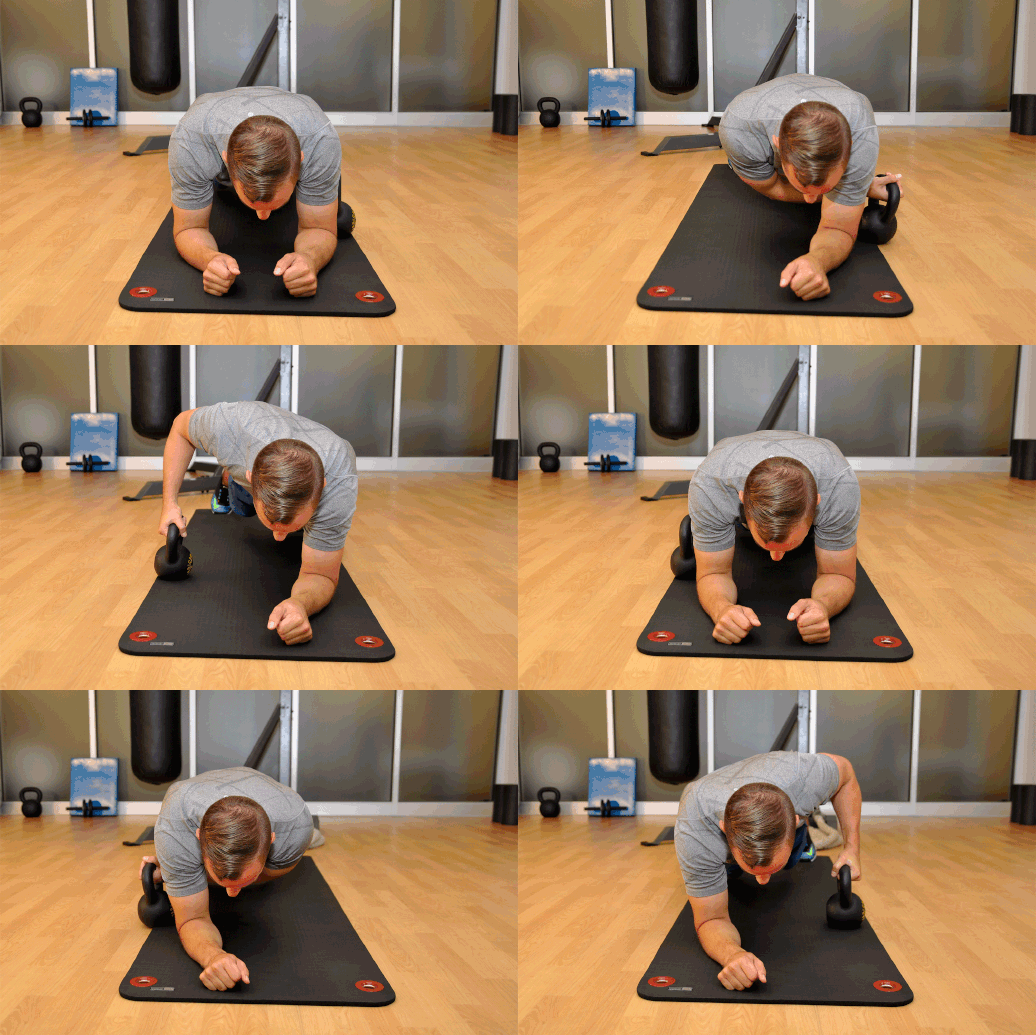
The real challenge of this variation comes from holding yourself in a plank using only one arm.
HOW TO DO IT:
- Grab a relatively light kettlebell and set it next to you.
- Get into a plank with the kettlebell on the outside of your left elbow.
- Reach your right hand behind your left elbow to grab the kettlebell.
- Drag the kettlebell all the way across your mat and place it outside of your right elbow.
- Place your right elbow down on the mat.
- Repeat with the left hand.
BODY SAW PLANK

For this exercise you’re basically going to perform a sliding plank, so you’ll need something to put under your feet. You can use hand towels on a hardwood floor or buy sliding discs to use on carpet. The key to this exercise is to keep your hips in the same position while you pull yourself up; don’t let them drop!
HOW TO DO IT:
- Put the sliders or towels under your feet and get into a plank.
- Slowly slide your body backward while maintaining a straight line from your head to your feet.
- Slide back as far as you can with good form.
- Pull yourself back using your arms.
Continue Reading on PAGE 2

